


By opening the Customise Ribbon window from any page that has a ribbon, you can customise the ribbon to optimise it for your work processes and preferences. For example, if you frequently use the Dimensions window, you can add the Dimensions action to the Process actions group. You can also remove actions that you never use for better overview.
 Note Note |
|---|
| Depending on the setting in the UI Elements Removal field in the Microsoft Dynamics NAV Server Administration tool, only actions that you have permissions for will appear in the Customise Ribbon window. For more information, see How to: Specify How UI Elements Are Removed. |
You can make multiple customisations of the same page based on different access points to the page. For example, you can customise that the ribbon in the Sales Orders window looks different when the window is opened from the Customer Card window than when it is opened from your Role Centre. The point from which you access the page to be customised is recorded in that specific page customisation. Accordingly, there may be multiple customisation records for the same page under your logon, as you can see in the Delete User Personalisation window.
You can perform the following tasks to customise ribbons on pages:
-
Add, rename, or remove tabs, groups, actions, and menus.
-
Change the order of actions.
-
Restore the ribbon to its default setting.
 Important Important |
|---|
Be aware of the following limitations when you customise the ribbon.
|
 Caution Caution |
|---|
| Any customisation that alters the ribbon could affect the guidance provided in the Microsoft Dynamics NAV Help, because navigation steps in Help may refer to a different ribbon layout. |
The following procedures describe how to perform typical customisation of ribbons by working with groups, but the same steps apply to working with tabs.
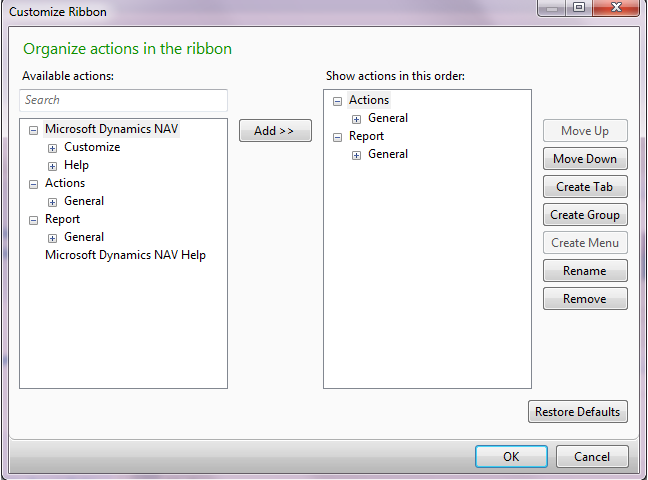
To start customising a ribbon
On a page with a ribbon, on the Application menu
 , choose Customise, and then choose Customise Ribbon.
To filter for actions
In the Available actions field, type to filter for the action type that you want to add. The list of available actions is filtered as you type.
To add a new group
On the right side of the window, choose the Create Group button.
Enter the name of the new group.
To rename an existing group
Select a group to rename, and on the right side of the window, choose the Rename button.
Enter a new name for the group.
To remove an existing group
Select a group to remove, and on the right side of the window, choose the Remove button.
To add an action to a group
Select a group to move the action into.
Locate the action under Available actions, and choose the Add button.
Note In some cases, an action can be a promoted action if the PromotedIsBig property is set to Yes in the Microsoft Dynamics NAV Development Environment. If an action has this setting, this takes precedence over your choices in the Customise Ribbon window. For more information, see How to: Promote Actions to the Ribbon on Pages.
To create a menu of actions
On the right side of the window, choose the Create Menu button.
Note You can only create menus inside groups, not inside tabs. Enter the name of the new menu.
Move actions from Available actions into the new menu.
| Caution |
|---|
| You can nest a menu within another menu, but this is not recommended. |
To change the order of actions
Select the action to move, and then choose the Move up or Move down button several times to move the action to the desired position in the hierarchy.
To restore default settings
In the Customise window, choose Restore Defaults, and then choose the OK button.
Note All customisation of ribbons that you have ever made for this page under your current user logon or since you last used the Restore Defaults button are cancelled. The layout of the ribbon on the page is reset to the default configuration for your profile. For more information, see How to: Cancel UI Personalisation.
 Tip Tip |
|---|
For more information about how to work with fields and columns, see Working with Microsoft Dynamics NAV. For more information about how to find specific pages, see Search. |
See Also
Delete User Personalisation
Working with Microsoft Dynamics NAV
Tasks
Troubleshooting: Removing Promoted Actions in Home TabHow to: Customise FastTabs
How to: Customise FactBoxes
How to: Cancel UI Personalisation
Reference
Personalize the User InterfaceConcepts
RibbonCustomise the User Interface
Learn About the RoleTailored Design